
Getting Started with zipBoard: For Learning Designers
As a learning designer, managing and collaborating on SCORM packages, instructional videos, and e-learning PDFs can be challenging. zipBoard simplifies this process by providing a central platform for reviewing, annotating, and tracking progress.
This guide helps you navigate zipBoard’s features tailored to learning design workflows.
Step 1: Set Up Your Project
- Log in to zipBoard and click "Create a New Project."
- Name your project or specify the type of learning materials you’ll review (e.g., SCORM Modules, Training Videos, PDF Guides).
- Set statuses at the project level (e.g., Draft, Review, Final) to reflect your workflow.
📌 Pro Tip: Organize your project into boards, such as Storyboard Review, SCORM Testing, and Video Feedback.
Step 2: Upload Learning Materials
- Navigate to your project dashboard and click "Add Files."
- Upload SCORM packages, video files, or PDFs. For SCORM content, zipBoard can host and preview the content directly.
- Categorize files into boards (e.g., Module 1, Assessments) to streamline navigation.
📌 Example: Upload a PDF guide for Module 1 and categorize it under Learner Handouts.
Step 3: Annotate and Review Content
- Open any uploaded file (e.g., a SCORM module, video, or PDF).
- Use annotation tools to:
- Mark issues or suggest edits directly on the file.
- Add timestamps on videos for precise feedback.
- Highlight text in PDFs to point out errors or suggest revisions.
- Reply to comments, accept/reject feedback, and mark annotations as Resolved or Cancelled.
📌 Pro Tip: Use zipBoard's comment threads to collaborate in real time with stakeholders.
Step 4: Track SCORM Package Testing
- Preview SCORM content directly in zipBoard to test navigation, interactivity, and completion tracking.
- Report any bugs or inconsistencies by creating tasks linked to specific slides or elements.
📌 Example: If a quiz question in a SCORM package doesn’t load, highlight the issue and tag the developer to fix it.
Step 5: Share Learning Materials with Stakeholders
- From the project dashboard, select the SCORM package, video, or PDF you want to share.
- Click "Share Link" and customize permissions:
- Viewer Only: Allow collaborators to view the material without editing or commenting.
- Commenter: Enable reviewers to add annotations or comments.
- Share the link with stakeholders via email or integrate it into platforms like Microsoft Teams or Slack.
📌 Pro Tip: Use zipBoard’s guest access feature to involve external reviewers (e.g., SMEs or clients) without requiring them to create an account.
Do Reviewers Have to Verify Email When Signing Up/Login?
If the clients and users are required to login, they have to verify their account by following these 4 simple steps.
Step 1 — Sign Up or Accept an Invitation
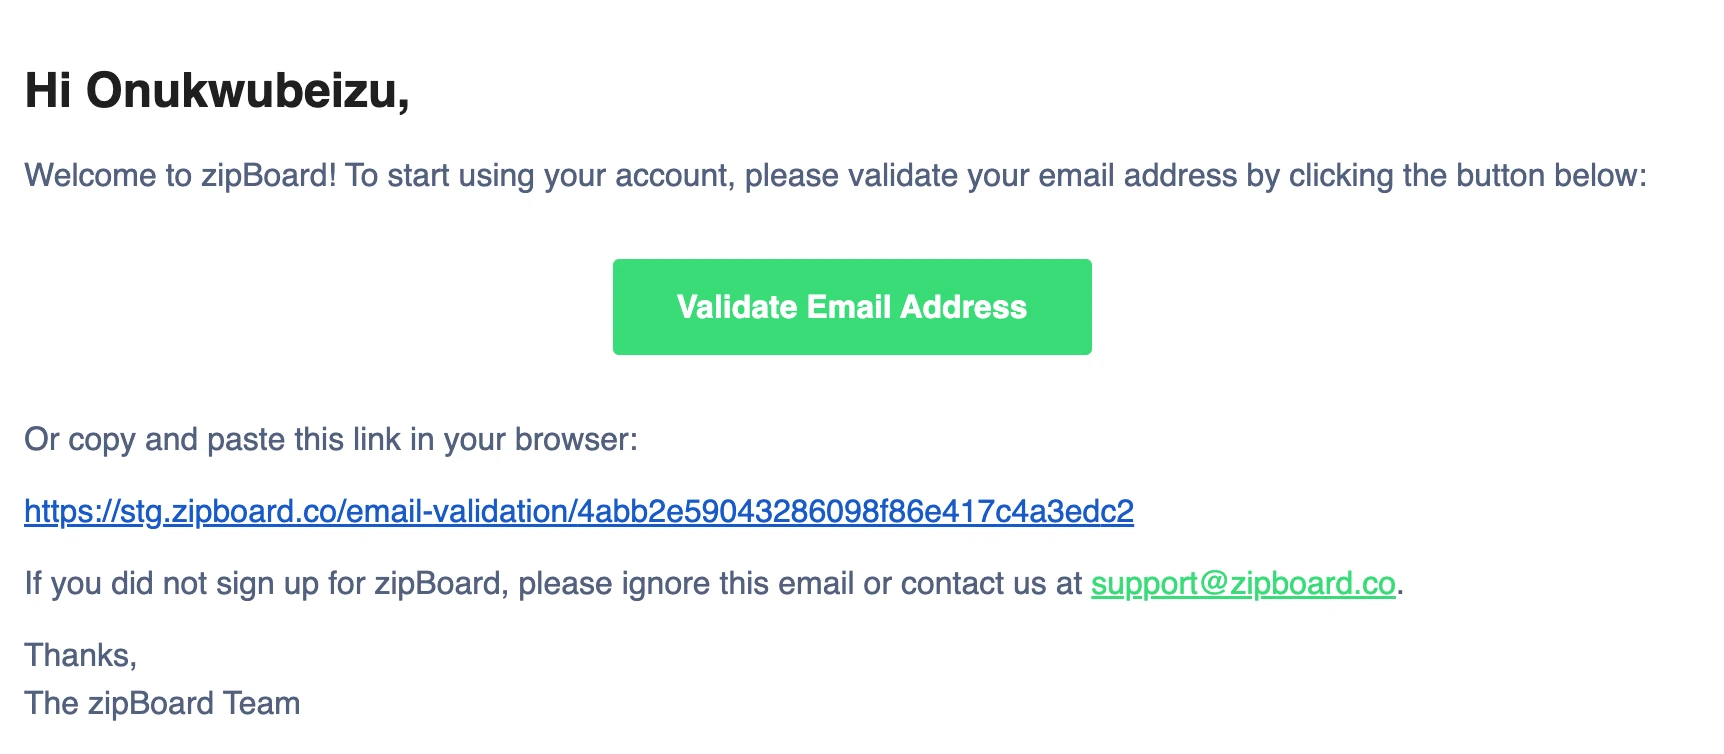
When you create a new zipBoard account or click an invitation link from a teammate, you'll be prompted to enter your email address and set a password. Once you submit the form, zipBoard automatically sends a verification email to the address you provided.
Step 2 — Check Your Inbox
Open the inbox for the email address you used during sign-up. Look for an email from zipBoard with the subject line similar to "Verify your email address" or "Confirm your zipBoard account". The email typically arrives within 1–2 minutes.
💡 Tip: If you don't see it in your primary inbox, check your Spam, Junk, or Promotions folder. Corporate email systems and filters sometimes route automated emails there.
Step 3 — Click the Verification Link
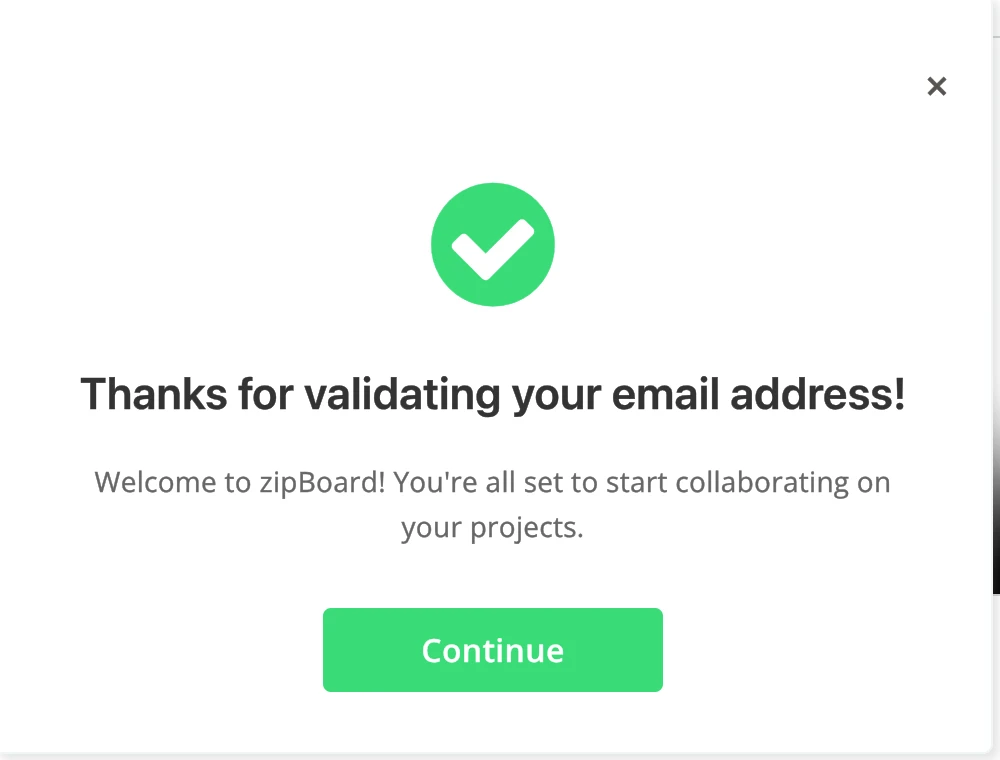
Open the email and click the "Verify Email" button or link. This will open a browser tab confirming that your email has been successfully validated.
Note: To prevent our mail servers from being overwhelmed, there is a 30-second cooldown on this button. If it is greyed out, simply wait for the countdown to hit zero to try again.
Step 4 — Start Using zipBoard
That's it! Once verified, you have full access to your zipBoard account. You can now create projects, annotate files, collaborate with your team, and receive all notifications.red route to be as simple and frictionless as possible. Here is a breakdown of the key elements you’ll see:
Step 6: Track and Prioritize Feedback
Once feedback starts coming in, it’s essential to organize and act on it:
- Triage feedback based on its urgency, relevance, and impact on learner outcomes.
- Prioritize actionable feedback that aligns with project goals.
Learn more about tracking and prioritizing feedback here.
Step 7: Manage Versions and Updates
- Upload updated versions of SCORM files, videos, or PDFs as feedback is implemented.
Step 8: Generate Reports
- Use zipBoard’s reporting tools to compile feedback and unresolved tasks into a shareable report.
- Share reports during construction meetings to prioritize action items.
Benefits of Using zipBoard for Learning Design
- Centralized Review: Host and manage SCORM, videos, and PDFs in one place.
- Streamlined Feedback: Annotate directly on content for precise and actionable reviews.
- Version Control: Ensure stakeholders always see the latest iteration of the material.
- Collaboration Made Easy: Engage with reviewers in real time, even if they’re external to your team.