
Getting Feedback
📌 For new updates, please refer to this article.
First, we have to invite stakeholder(Client) or guest or collaborator to get feedback from them
Inviting a stakeholder(Client) to project to get feedback
1. Log in to zip board account from owner/Manager account
2. Navigate to Collaborator tab
3. Hit 'Add client'
4. Enter mail id and click on 'Invite'

Once after the person added as the client, they can log in from their account add feedback from the 'feedback' tab.

Inviting a guest to add feedback
1. Login With Zipboard account
2. Select a file to be shared from the project
3. Hit 'share' link
4. Share link settings tab open-- > toggle options to share with guest

5. Email is sent to guests with link, using that link they can navigate to review and add feedback.
Adding a Collaborator to project to add feedback
1. Login from owner/manager account
You can add collaborators using their email addresses or name (which will come as auto-suggest if you’re already associated with the person in any way on zipBoard) from collaborators tab.
2. Once collaborator is added to account, they can add feedback by login to their account from
Feedback tab --.> Add feedback link.
Do Reviewers Have to Verify Email When Signing Up/Login?
If the clients and users are required to login, they have to verify their account by following these 4 simple steps.
Step 1 — Sign Up or Accept an Invitation
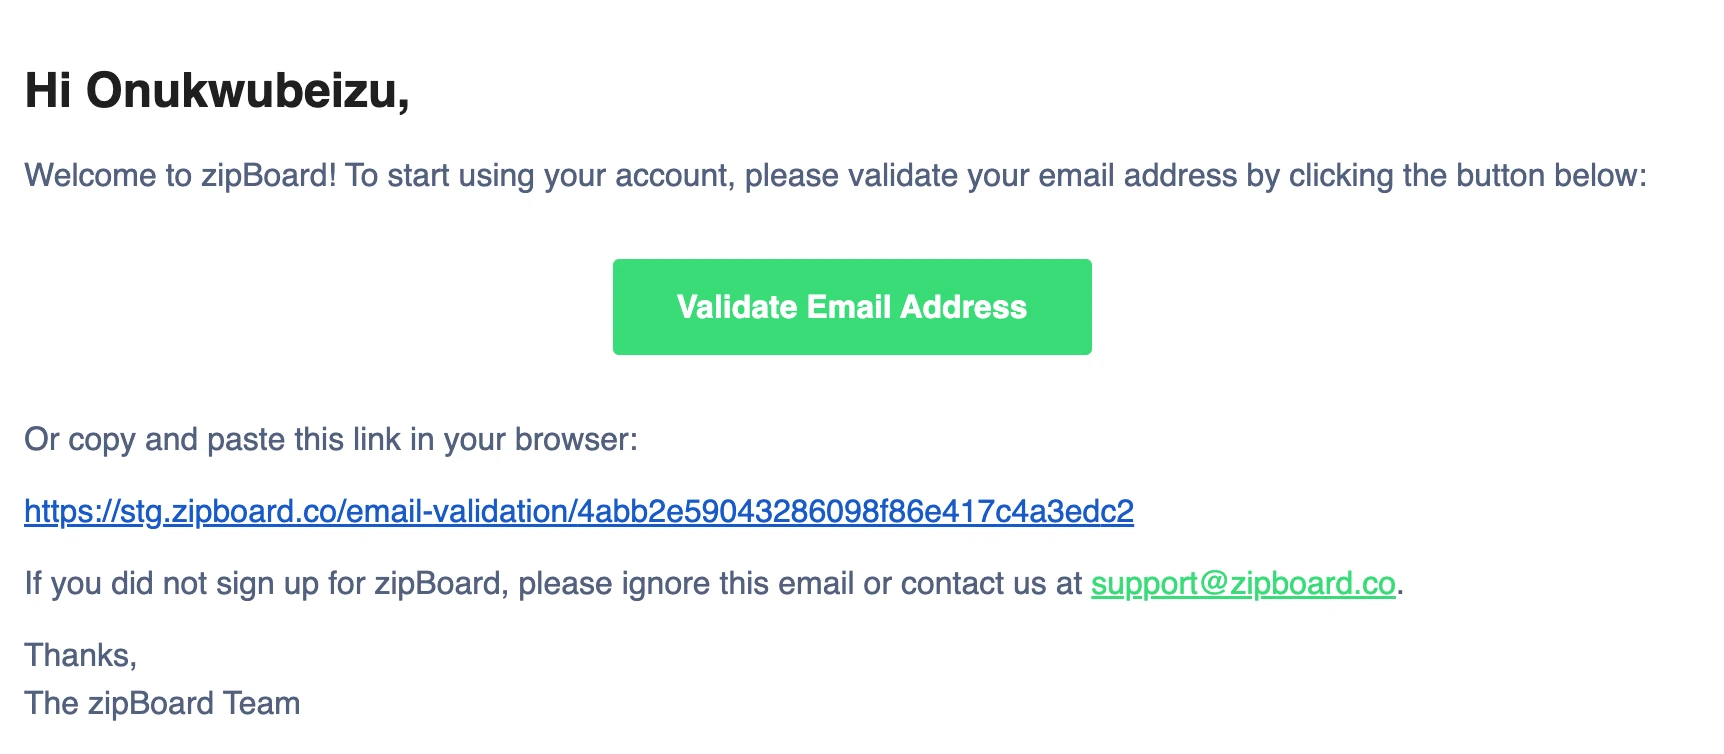
When you create a new zipBoard account or click an invitation link from a teammate, you'll be prompted to enter your email address and set a password. Once you submit the form, zipBoard automatically sends a verification email to the address you provided.
Step 2 — Check Your Inbox
Open the inbox for the email address you used during sign-up. Look for an email from zipBoard with the subject line similar to "Verify your email address" or "Confirm your zipBoard account". The email typically arrives within 1–2 minutes.
💡 Tip: If you don't see it in your primary inbox, check your Spam, Junk, or Promotions folder. Corporate email systems and filters sometimes route automated emails there.
Step 3 — Click the Verification Link
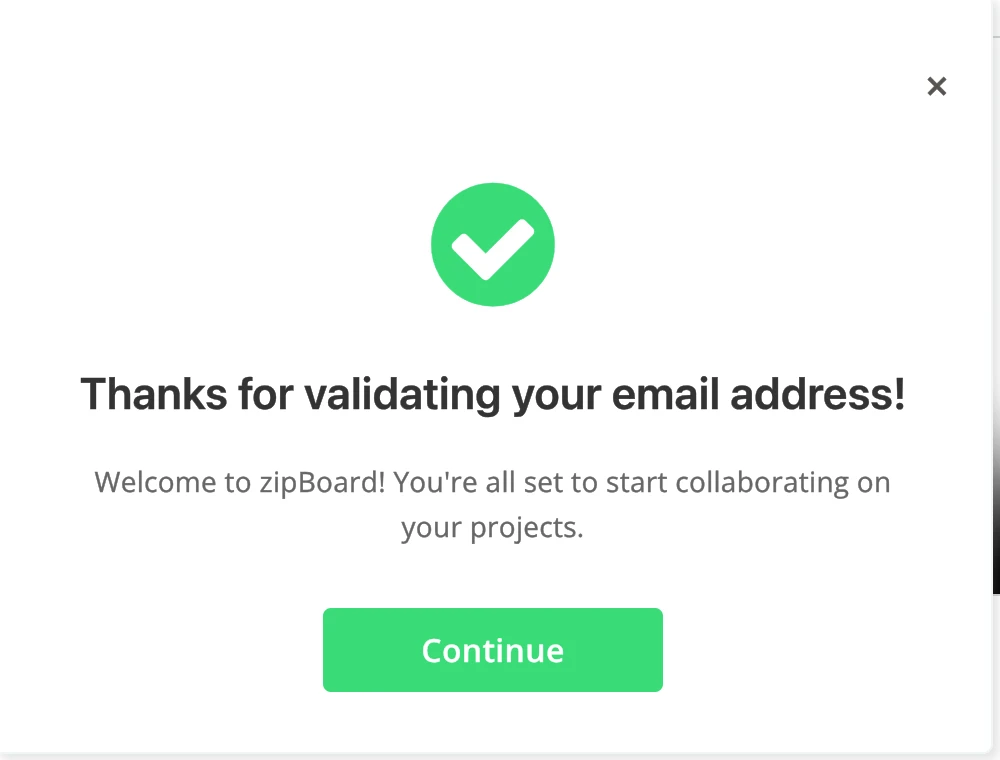
Open the email and click the "Verify Email" button or link. This will open a browser tab confirming that your email has been successfully validated.
Note: To prevent our mail servers from being overwhelmed, there is a 30-second cooldown on this button. If it is greyed out, simply wait for the countdown to hit zero to try again.
Step 4 — Start Using zipBoard
That's it! Once verified, you have full access to your zipBoard account. You can now create projects, annotate files, collaborate with your team, and receive all notifications.red route to be as simple and frictionless as possible. Here is a breakdown of the key elements you’ll see:
Reminder
If you're not sure what kind of share link you've been given, it's always best to contact the person who shared the link with you to double check the permissions they have enabled for you. For more information on other types of share link access, click here.
If you receive a strange zipBoard Link from an unknown account or you encountered a potential phising link, kindly report it to us at support@zipboard.co