Getting Started with zipBoard: A Workflow for Everyone
- Capture stakeholder reviews & feedback
- Triage the feedback into internal workflow
-
Manage issues and tasks
Keeping these major requirements in mind we have designed zipBoard.
Before we dive in to show you all the main features of zipBoard. Make sure you have already signed up for the free trial and are logged in to zipBoard.
In case you haven't signed up yet please go ahead and Sign up for a free account here and get started.
By setting up zipBoard as your main feedback management tool, you are going to speed up your content development process.
Step 1 - Create a new project
Start by creating a new project. Once you are logged into your account, click on the big plus button to create a new project. Refer to the below preview.
Add title, description and there is a custom project id that you use in your workflow then you can use that also.
Step 2 - Upload content
The next step is to add content for review.
zipBoard lets you share quick feedback on working content like webpages, web apps, e-learning courses, PDF documents, images, videos. You can create reviews through the development lifecycle using screenshots and annotated screens.
In order to add your content to zipBoard, you can add a webpage URL, a zipped SCORM file ( for e-learning courses), mp4 files ( for videos), image files, PDF documents, and files hosted on cloud storage like dropbox or google docs as links.
Content can also be added afterwards while reviewing files or adding comments. You can always add more content by simplifying uploading it with tasks, comments.
Here is a more detailed step by step guide of “ How to upload and review SCORM/ Valid HTML content with zipBoard?”
Step 3 - Add Collaborators
It's always a great idea to have all team members added as collaborators from the start. These are people who will have full visibility of the project and can be assigned specific tasks to follow up on reviews.
You can always add more collaborators or guests at a later stage. However, by adding it in the beginning you can assign tasks or ask for a visual review from your team.
Adding collaborators is as easy as you see it below. For more detailed procedures you can even follow the step from this knowledge base article
Step 4 - Share files with guests for review and feedback.
Getting reviews and feedback from your clients or guests is important. But at the same time, you do not want to overwhelm them with internal tasks and discussions. Basically, all you need is a review from your client or external stakeholders.
To do this zipBoard allows adding guest collaborators who can only review and share feedback. For a detailed guide on this refer to our help doc.
For now, here is a quick preview of how you can do it.

Step 5 - Turn feedback into Tasks or create new tasks
Now you are ready to add and manage visual reviews and tasks.
Create tasks based on the feedback so that you can track progress. A good practice is to assign tasks for every feedback that you receive.
You can create tasks from the review board, project dashboard area, or even while making a comment on the existing tasks.
See how easy it is to create tasks
Step 7 - Set Priorities for your Tasks
It’s important that you set priorities for your tasks to move quickly with the high priority items.
zipBoard offers you a drop-down list of set priorities for you to choose from. Setting priorities makes sure that the collaborators understand the urgency of a particular task and work accordingly.
zipBoard automatically adds the date, time, creator, operating system environment, screen size when you are creating the tasks. This way you can even track each task if at all you need to.
Step 8 - Assign to Stakeholders
Now that the content is visually reviewed and tasks are created, it's time to assign tasks to the person who will be practically working on completing them.
Connect with the team and assign tasks to responsible stakeholders and set approx ETA.
zipBoard offers adding estimated ETA and real ETA.
Using the time tracking feature of zipBoard you can actually monitor the time taken to finish each task and the project as a whole.
For you to add stakeholders you will need to have them added as collaborators. If you did not add your collaborator while creating the account. You can add them now.
Step 9 - Move tasks in different boards
There are three main boards that any project can be categorized into.
- Backlog
- Work in Progress
- Completed
Additionally, you can even Future Ideas or anything custom that you can think of. You can create different boards s per your needs and drag the tasks into different boards or choose from the dropdown list.
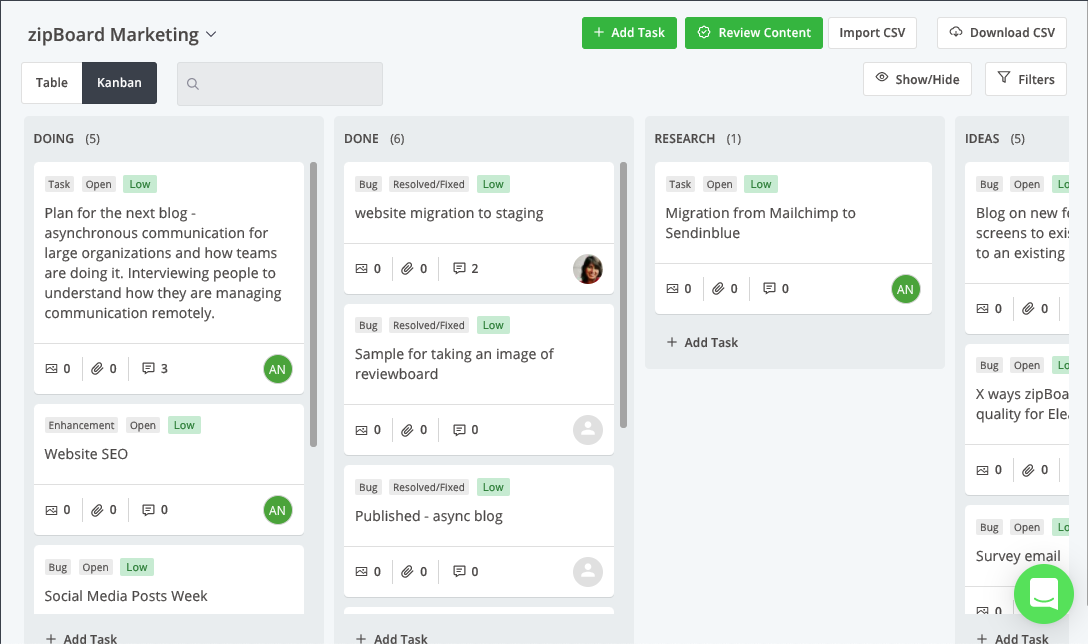
Step 10 - Customize your view
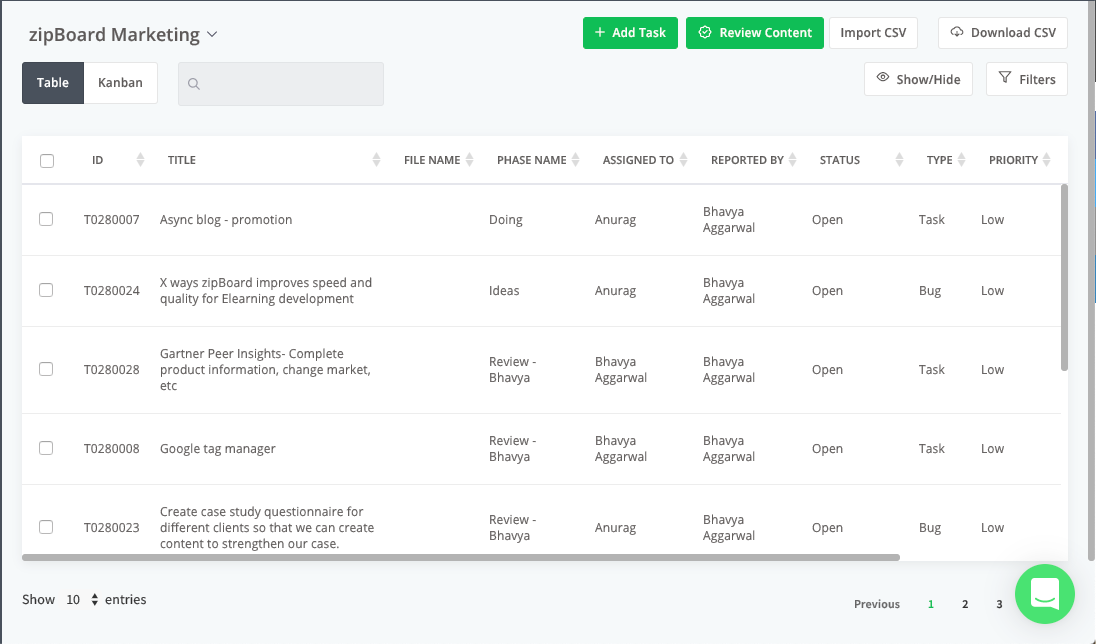
For an enhanced experience you can change the view of your dashboard, there are two views to choose from (Table View and Kanban View)
Refer to the below screenshot to see how each of these looks.
You can switch the views any time by using the toggle button right under the project name.
1. Table View
2. Kanban view