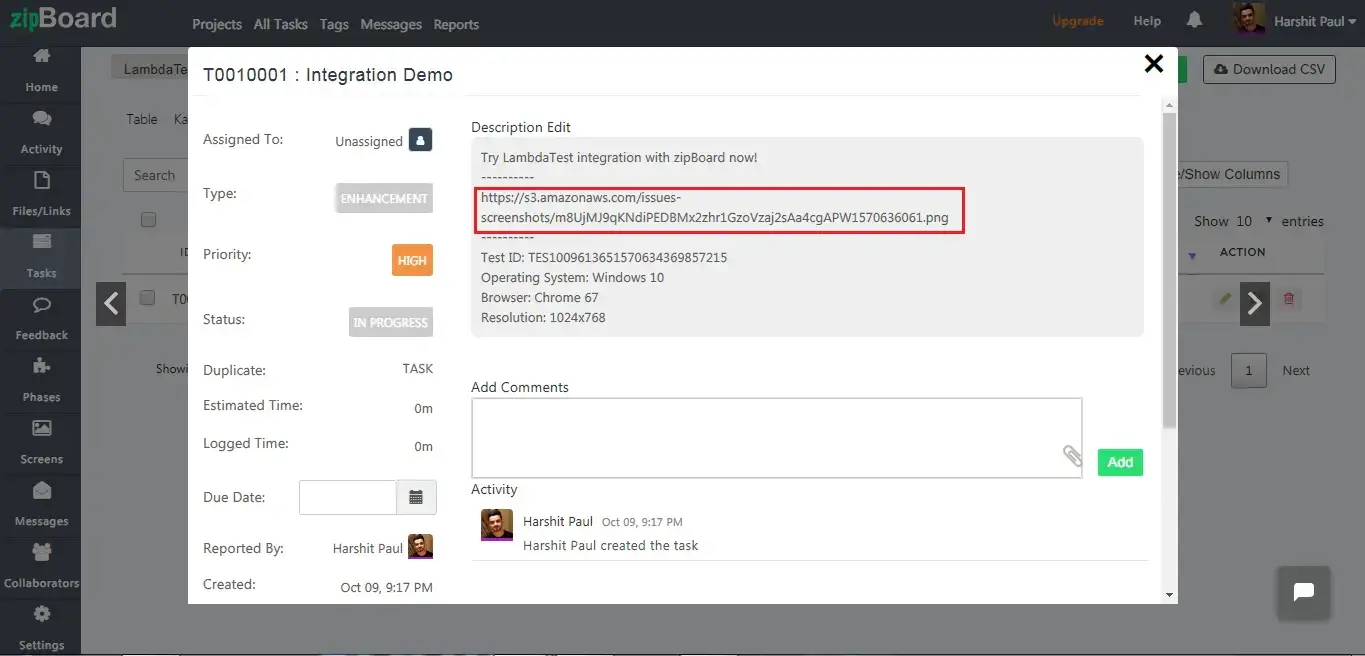
How to Log Your First Bug from LambdaTest to zipBoard?
Steps to log a bug from LambdaTest to zipBoard:
- Log in to LambdaTest and perform any type of testing. In this case, we will go with LambdaTest's screenshot testing feature under the drop-down menu for Visual UI Testing.
zipBoard also provides screenshots and screen recording in-house.
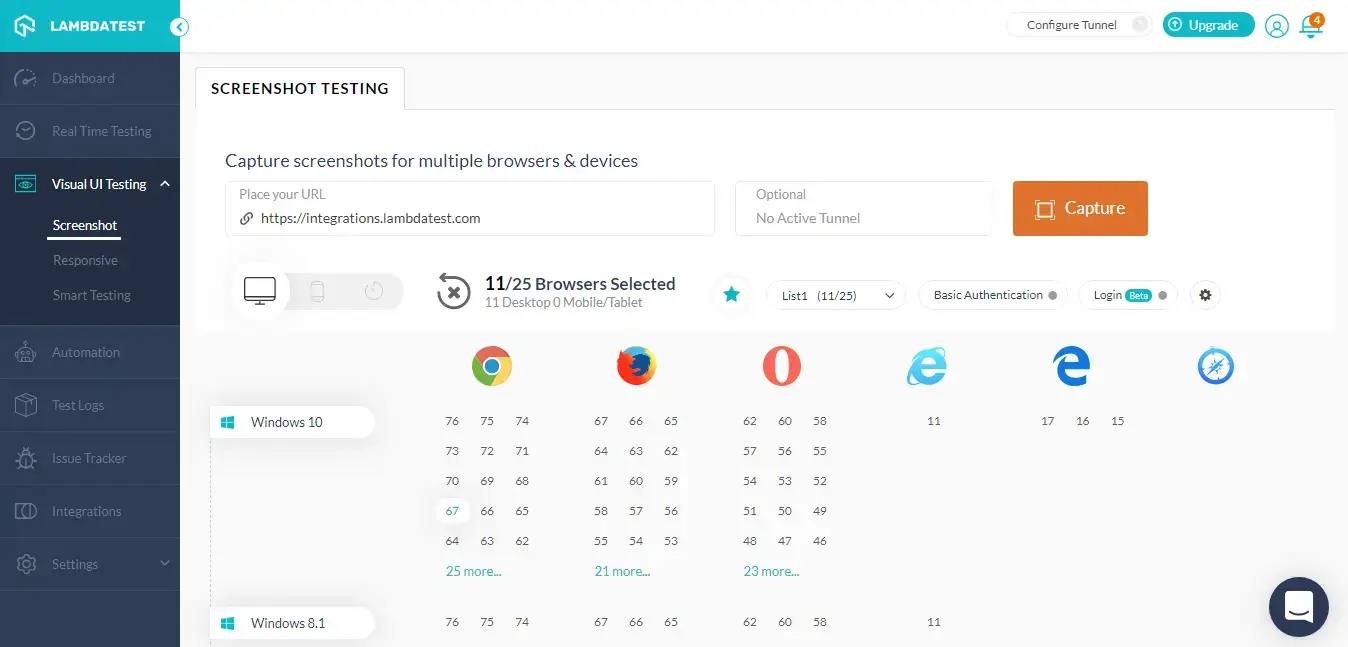
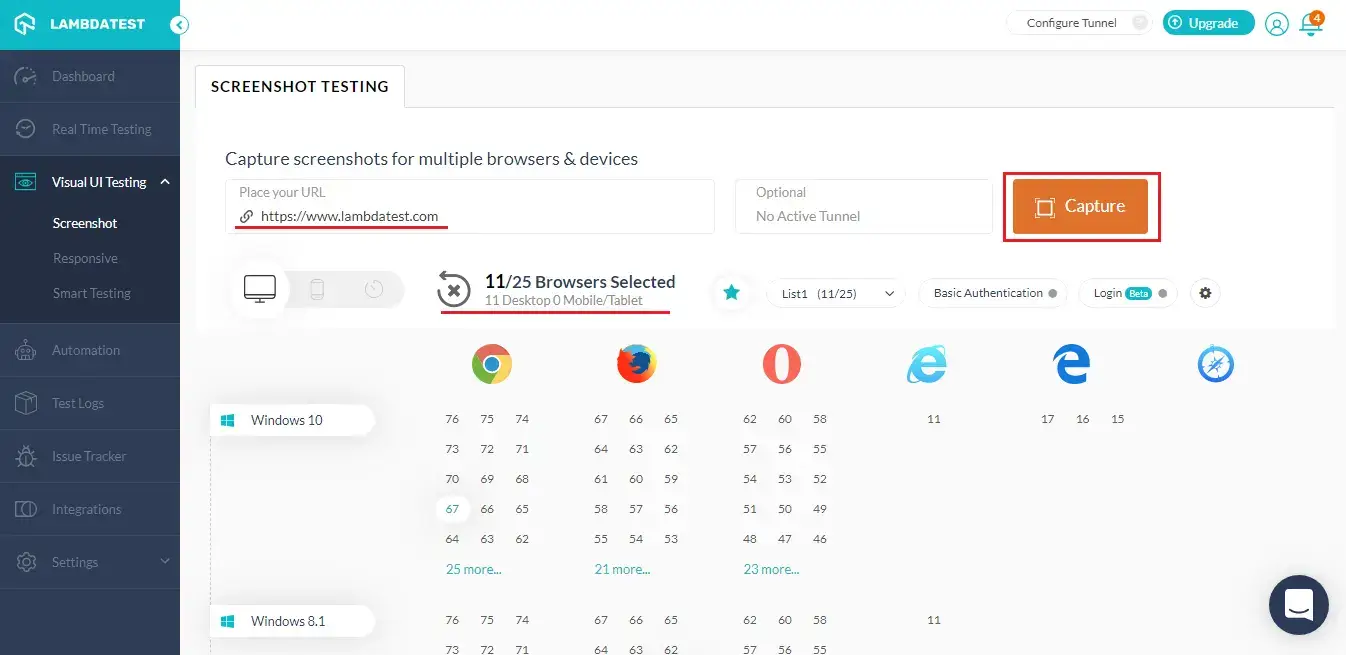
- Select the browsers for which you wish to capture a screenshot of your website and provide the test URL before you hit the Capture button.
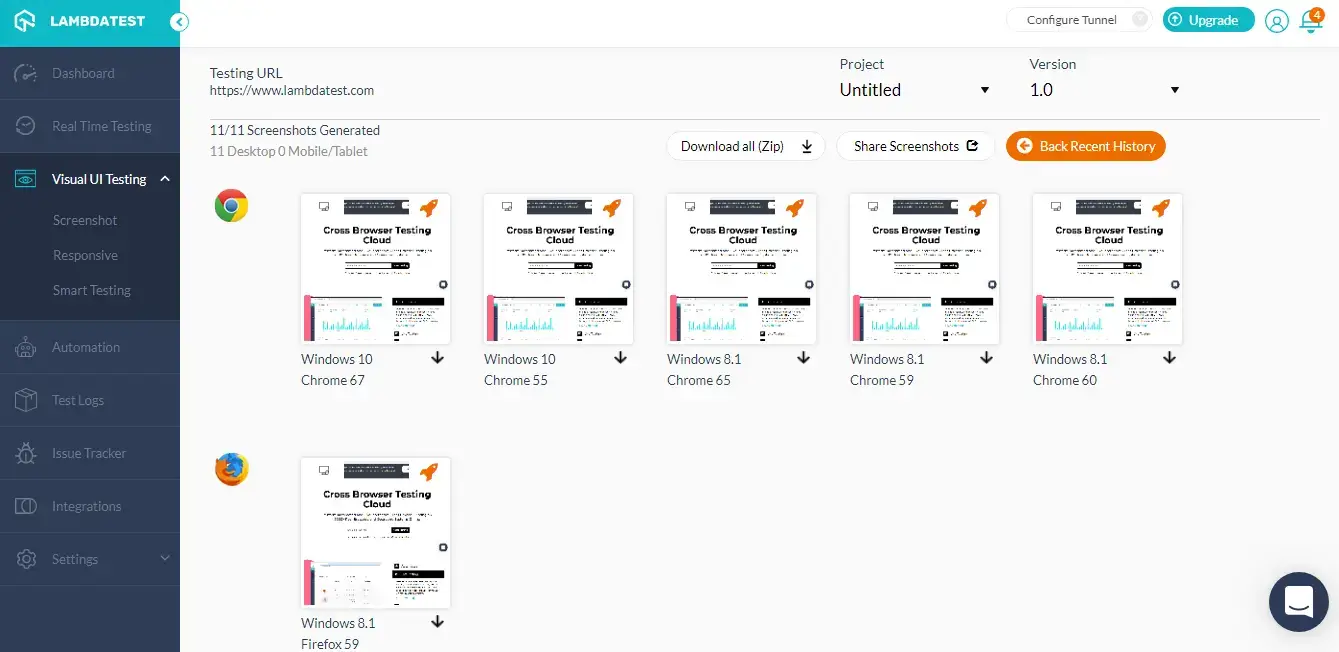
- Wait a few seconds and you will find your full-page screenshots for every configuration you selected.
- Once you have the screenshots ready, click on any screenshot and highlight the bug you wish to report. After you highlight click on the mark as bug button.
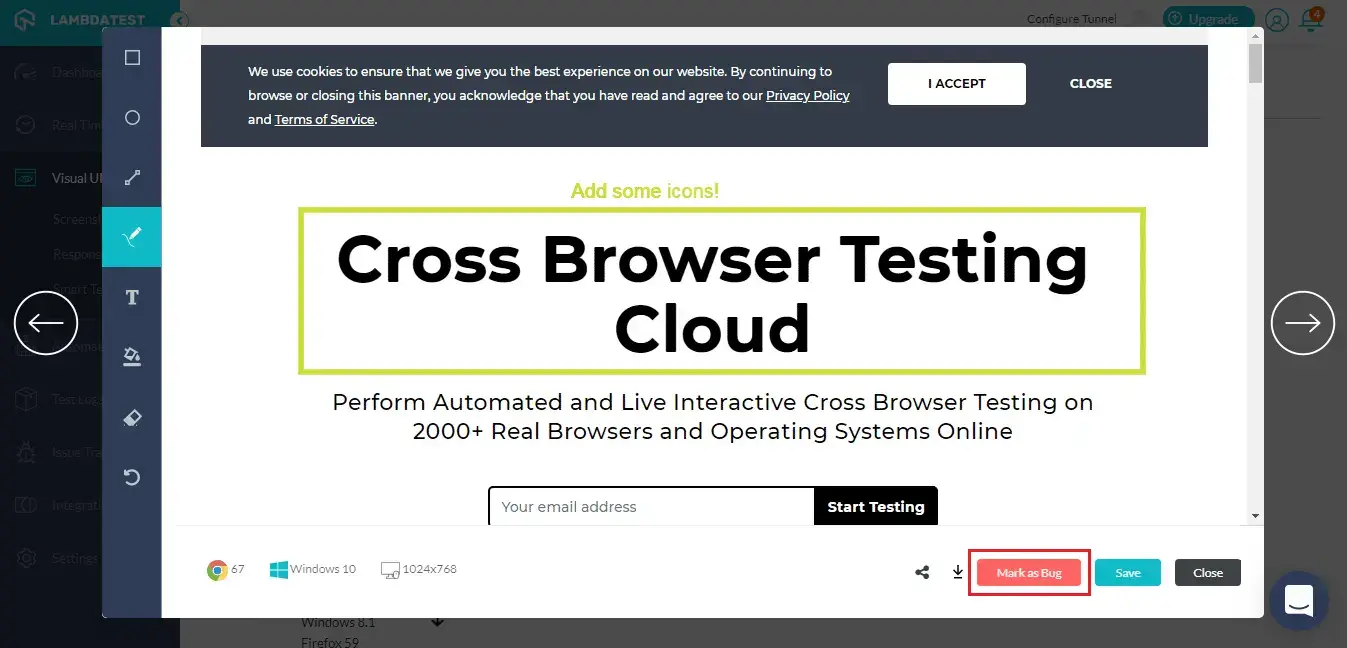
- A form specific to zipBoard would open up. You will need to fill in the details in this form before you create the issue. Doing so will directly mark a bug in your zipBoard instance.
You can attach the details below with the screenshot:
- Project
- Assignee
- Task Status
- Task Priority
- Task Type
- Task Name
- Description
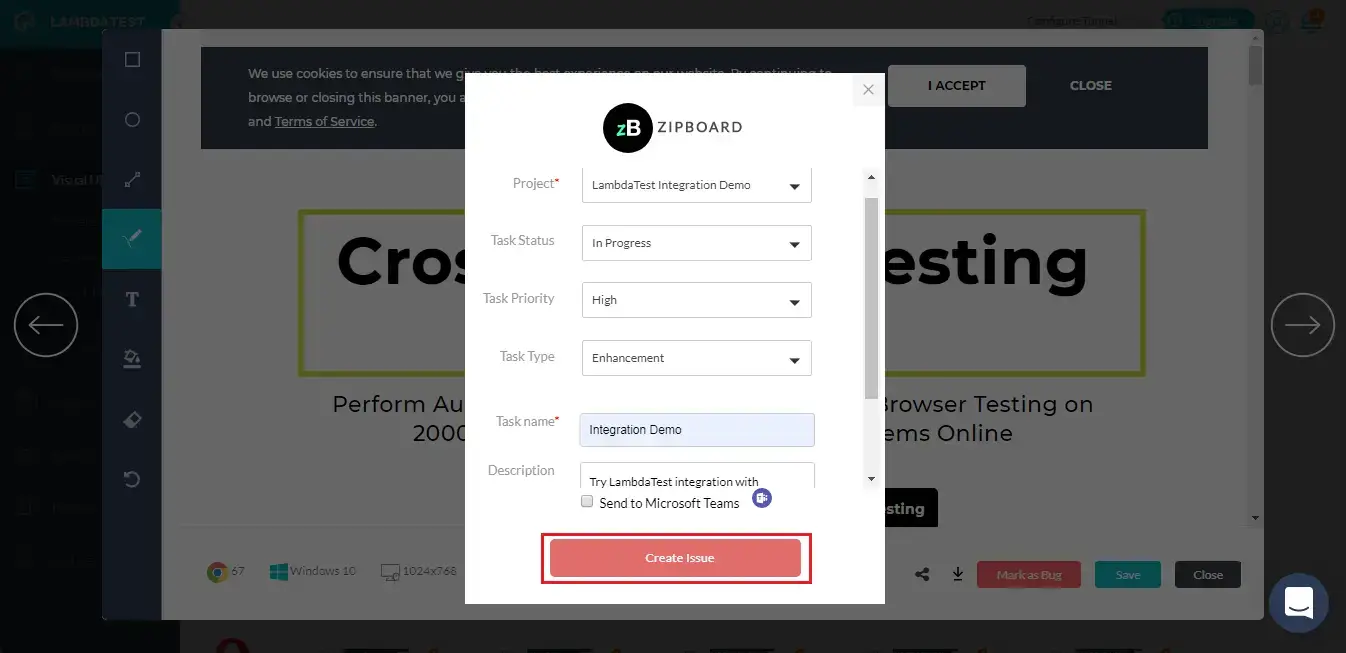
Every detail you provide at LambdaTest will automatically be reflected in the zipBoard task.
Note: After you click on “Create Bug”, you will be able to observe it being successfully marked through a single click effort. You will get prompt messages on top of your Virtual Machine indicating the progress of bug logging. After few seconds you will be notified with a prompt message “Bug successfully marked” indicating that the screenshot has been pushed to your zipBoard project.
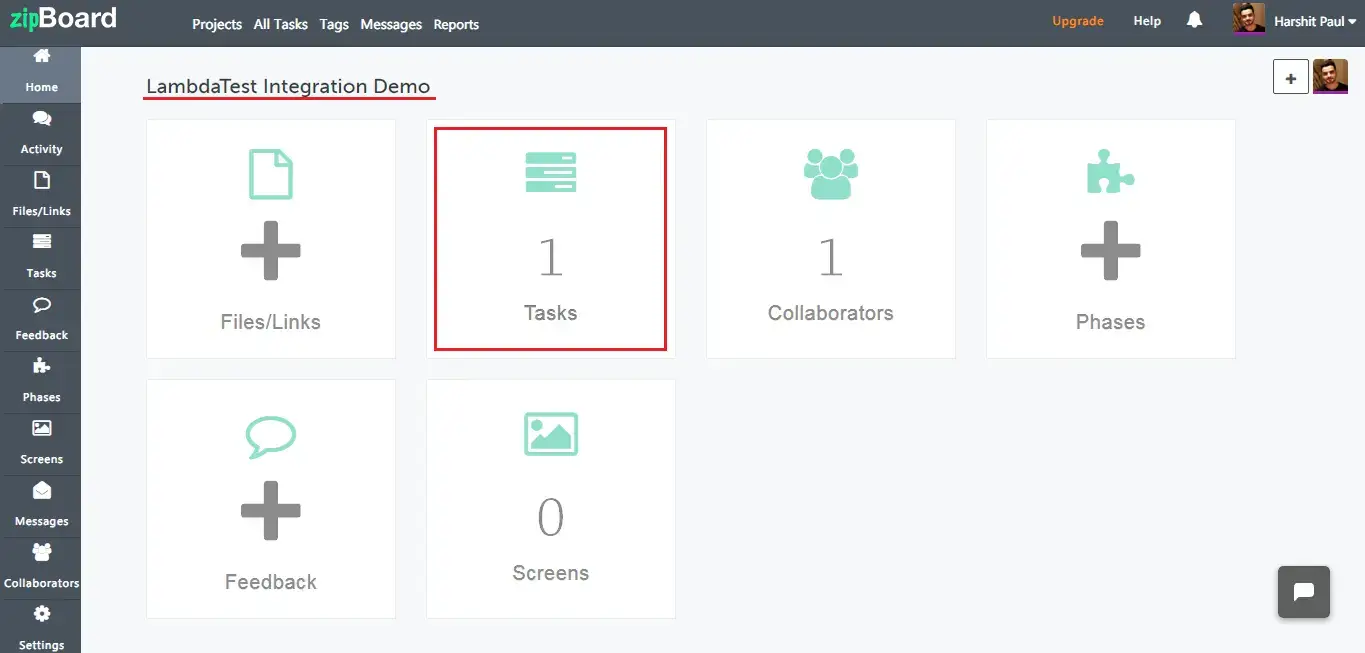
- If you visit your respective Project on zipBoard, you will find a new task created under it.
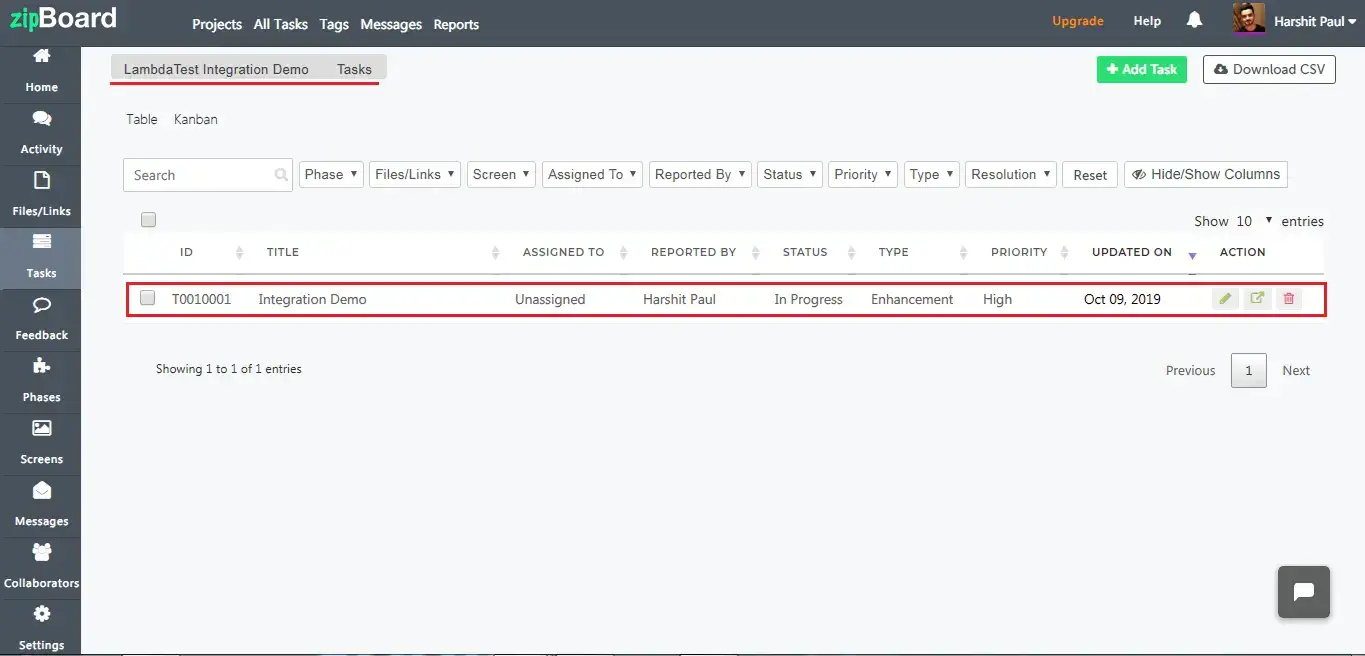
- Open tasks of the Project and you will find the bug marked from LambdaTest with all the information you specified while your performed cross-browser testing.
- Click on the task and you can also find the URL to the screenshot you highlighted at LambdaTest along with the test environment details.
